Wireguard
Add a VPN profile
When using Wireguard, you will generally have an wg-quick configuration file generated by the server. This files has the .conf extension and contains all the information regarding the connection with the server.
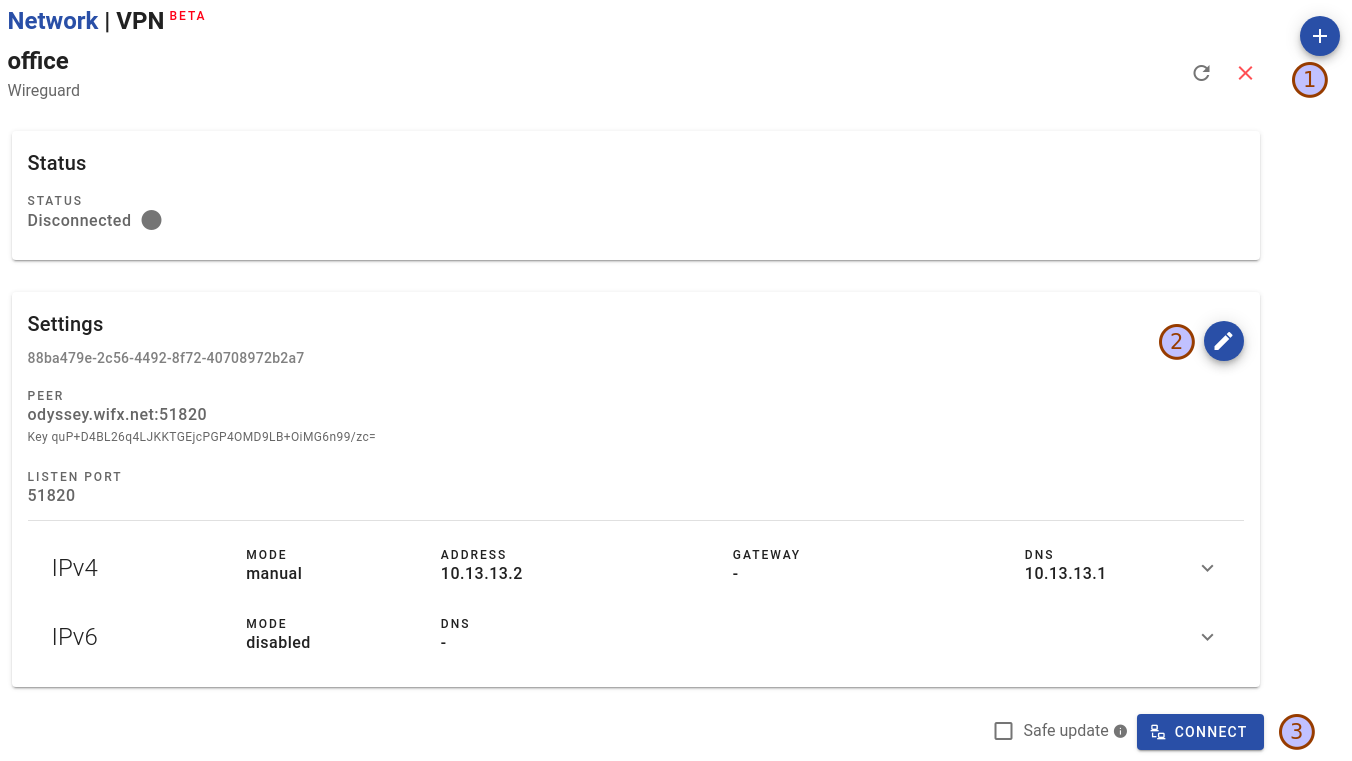
You can add a VPN connection from the Network > VPN page.

If you already have a VPN profile, the button is in the to right corner.
Connection method
Select Wireguard as the connection method.
General settings
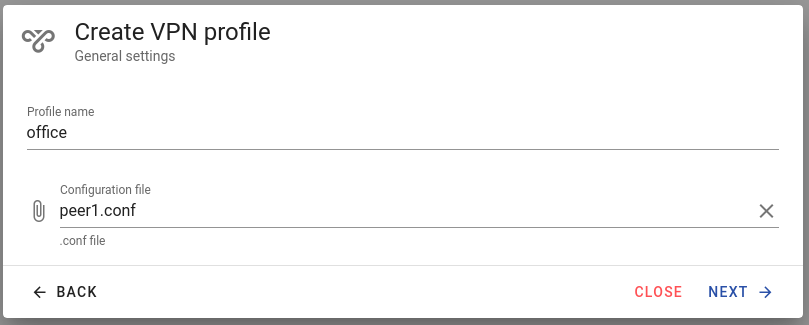
Enter the General settings:
- Profile : the name to identify the connection later. E.g. "office"
- Configuration file : upload the .conf configuration file. This files generally comes from your VPN administrator

When done, press Next.
Advanced settings
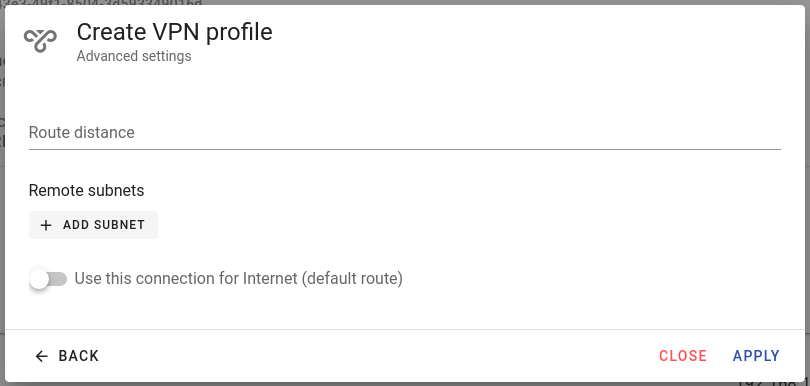
Advanced settings allows you to specify how the VPN connection will be used for networking.
- Route distance : priority of this connection over others. Defaults to 100.
- Remote subnets : if there are some subnets that have to be specifically reached through the VPN connection, add these here.
- Use this connection for Internet (default route) : use this connection as the default route. Check this if this is your main and default connection to the gateway. Please note that if you specify this, your gateway will be reachable only if your computer is also connected to the VPN.

When done, press Apply.
Connection status
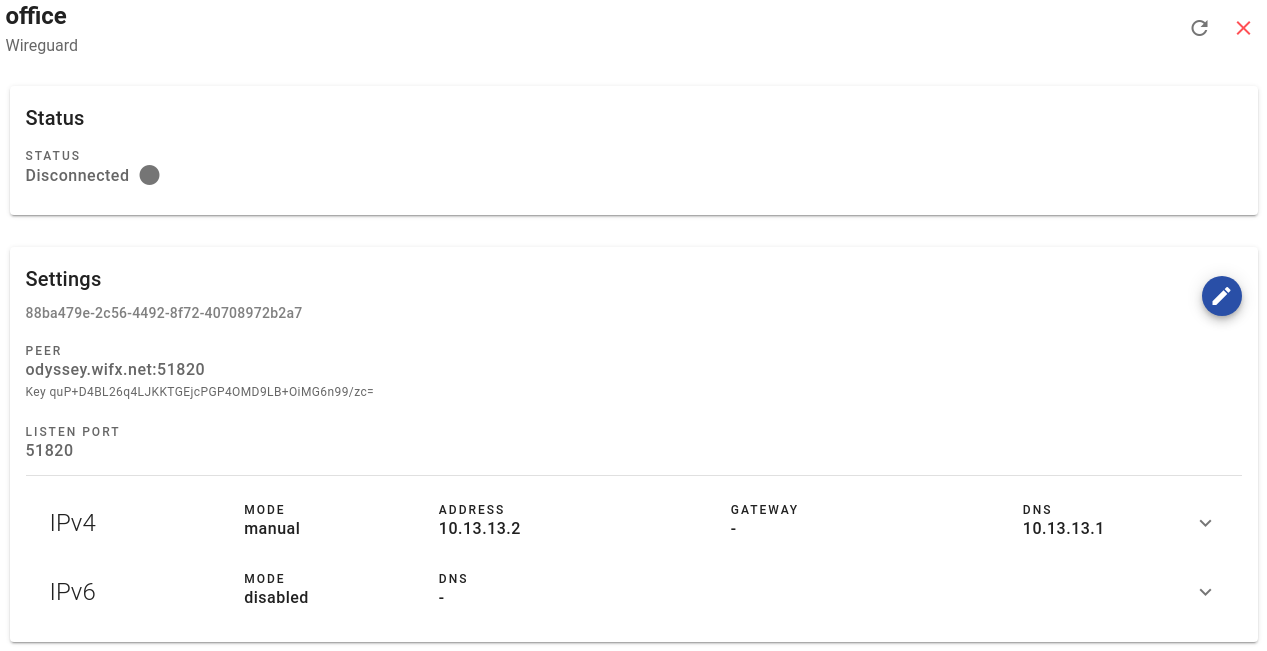
The newly create connection now appears on the VPN page.

To import such a .conf file, run:
sudo nmcli connection import type wireguard file <configuration.conf>This will add a connection profile to the NetworkManager. You can see the new profile in /etc/NetworkManager/system-connections and with nmcli :
nmcli connectionUpdate a profile
You can edit the VPN configuration through the edit button (2).

You can only edit the profile when it's disconnected.
You can also edit the connection profile if you have to update some parameters. You can either change the configuration through the nmcli tools or by editing the profile file located in /etc/NetworkManager/system-connections.
To use nmcli tools, please refer to the official documentation.
If you edit the profile configuration file, you must reload the profile after the change by running:
sudo nmcli connection reloadConnect to the VPN server
Once your profile correctly set up, you can enable the connection.
You can connect the VPN by pressing the Connect button (3).
If you've setup some routes (or set the connection as the default route) you may loose connection to the gateway. Be sure to always use Safe update to ensure you do not definitely loose access.

If you have to reconnect to the gateway through the VPN after connecting, you can change the IP address used for Safe update validation.
Wireguard has no information regarding connection state. It creates the bridge and that's all. This mean that "Connected" should be read a "Enabled" here. To check if the channel is working, you can ping an address on the server.
Once connected, auto-connect is automatically enabled for the VPN.
If you've setup some routes (or set the connection as the default route) you may loose connection to the gateway. You can create a checkpoint with NetworkManager to enable automatic connection recovery. The Manager GUI does this automatically.
sudo nmcli connection up <connection>Connection successfully activated (D-Bus active path: /org/freedesktop/NetworkManager/ActiveConnection/14)
NetworkManager will create an additional connection : the tunnel used by the VPN.
You can then check the details of the connection with:
nmcli con show <connection>Auto-connect at boot
You'll probably be interested in configuring the NetworkManager so that the VPN automatically connects after boot.
sudo nmcli connection modify office connection.auto-connect yes