OpenVPN
Add a VPN profile
When using OpenVPN, you will generally have an OpenVPN configuration file generated by the server. This files has the .ovpn extension and contains all the information regarding the connection with the server.
You can add a VPN connection from the Network > VPN page.

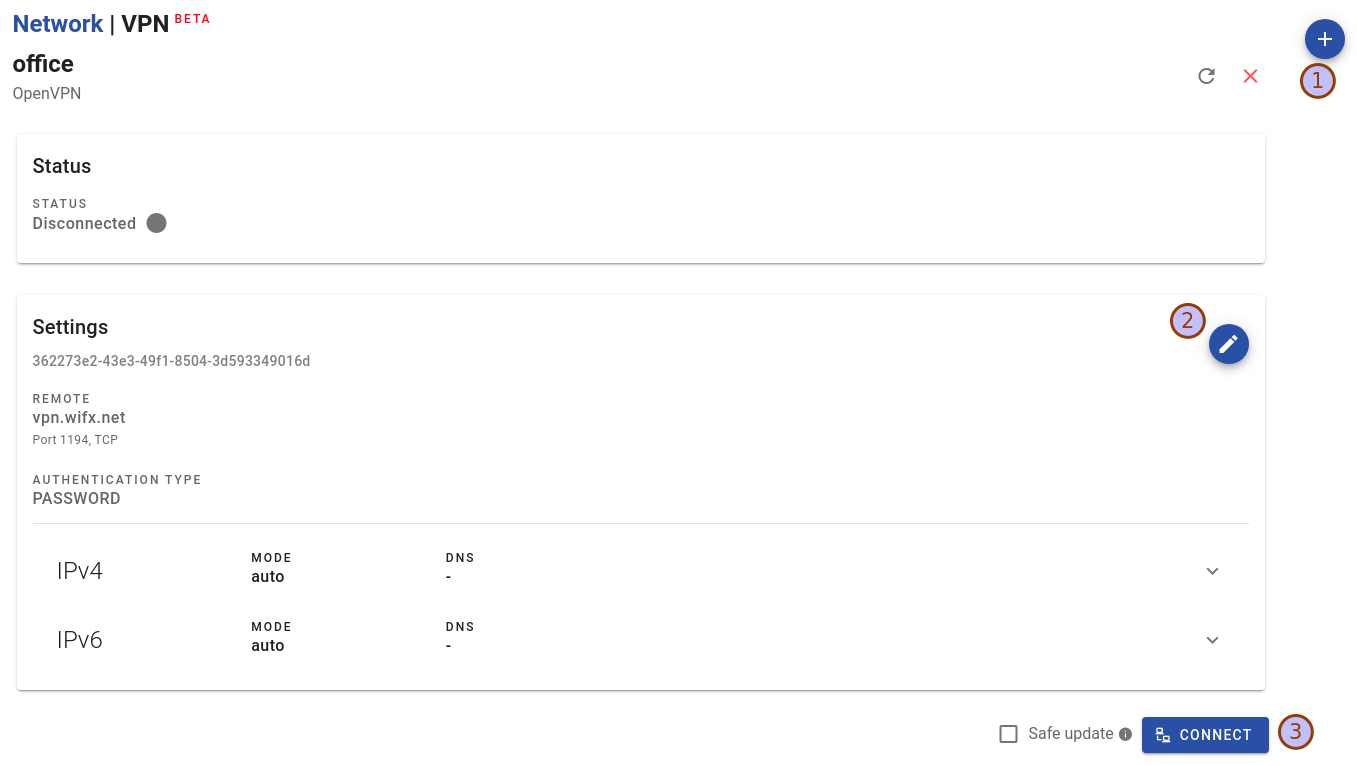
If you already have a VPN profile, the button is in the to right corner.
Connection method
Select OpenVPN as the connection method.
General settings
Enter the General settings:
- Profile : the name to identify the connection later. E.g. "office"
- Server settings : upload the .ovpn profile file. This files generally comes from your VPN administrator
- Username and password : if the profile uses username and password for authentication, set these values with what you received with the profile file.
- Private key password : if the profiles contains a private key, and the key is locked with a password, enter this password here. You generally receive this information from your VPN administrator.
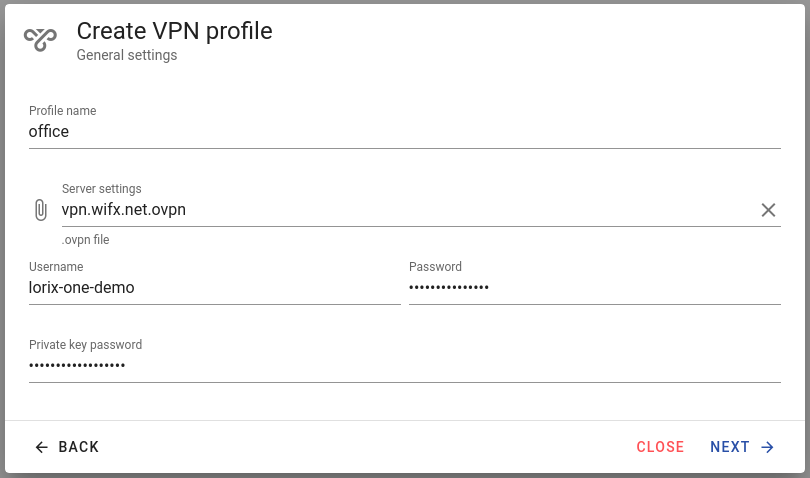
When done, press Next.
Advanced settings
Advanced settings allows you to specify how the VPN connection will be used for networking.
- Route distance : priority of this connection over others. Defaults to 100.
- Remote subnets : if there are some subnets that have to be specifically reached through the VPN connection, add these here.
- Use this connection for Internet (default route) : use this connection as the default route. Check this if this is your main and default connection to the gateway. Please note that if you specify this, your gateway will be reachable only if your computer is also connected to the VPN.
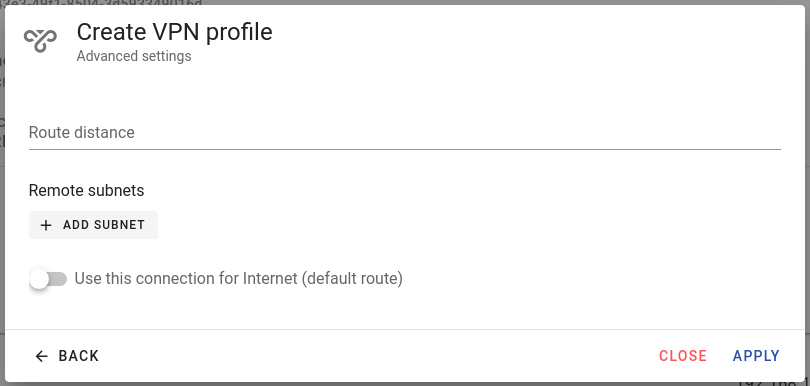
When done, press Apply.
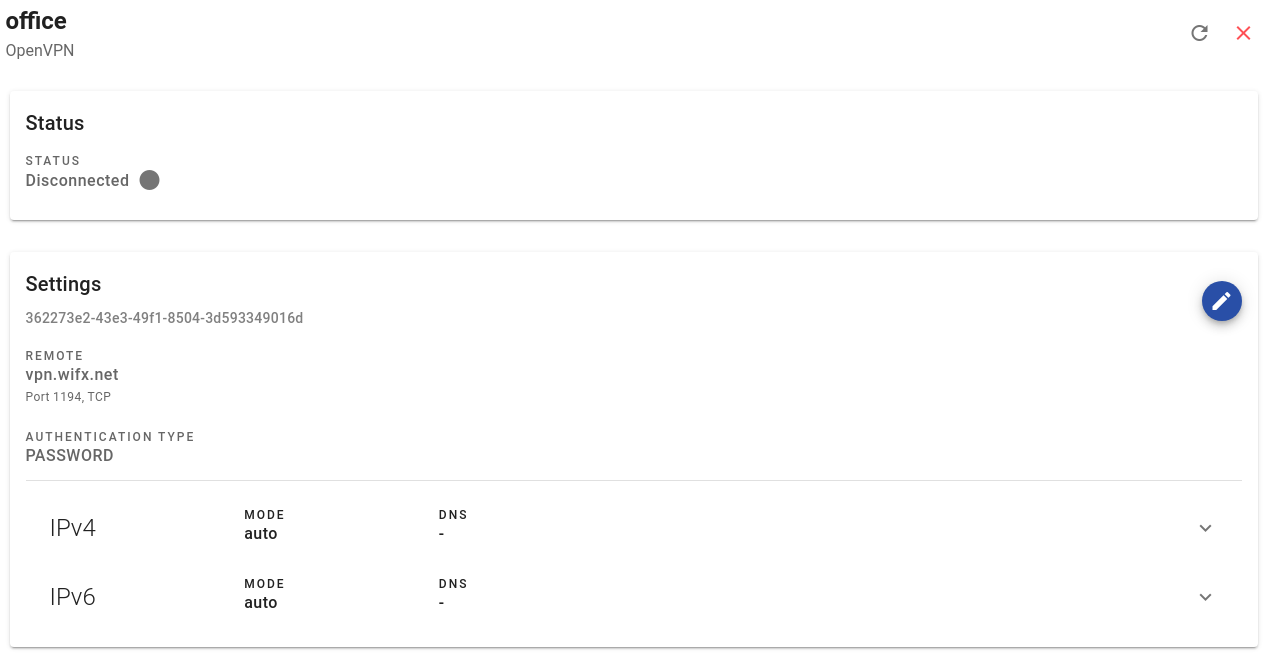
Connection status
The newly create connection now appears on the VPN page.
To import such a .ovpn file, run:
sudo nmcli connection import type openvpn file <configuration.ovpn>This will add a connection profile to the NetworkManager. You can see the new profile in /etc/NetworkManager/system-connections and with nmcli :
nmcli connectionSet passwords
By default, your configuration will generally not contain secrets like connection password or private key password. If your OpenVPN server requires this, you can add those secrets to your configuration.
To add a password:
Define connection password
sudo nmcli connection modify <connection> vpn.secrets password=<password>To add a private certificate key password:
Define connection certificate private key password
sudo nmcli connection modify <connection> vpn.secrets cert-pass=<password>Update a profile
You can edit the VPN configuration through the edit button (2).
You can only edit the profile when it's disconnected.
Credentials can only be changes by CLI.
You can also edit the connection profile if you have to update some parameters. You can either change the configuration through the nmcli tools or by editing the profile file located in /etc/NetworkManager/system-connections.
To use nmcli tools, please refer to the official documentation.
If you edit the profile configuration file, you must reload the profile after the change by running:
sudo nmcli connection reloadConnect to the VPN server
Once your profile correctly set up, you can enable the connection.
You can connect the VPN by pressing the Connect button (3).
If you've setup some routes (or set the connection as the default route) you may loose connection to the gateway. Be sure to always use Safe update to ensure you do not definitely loose access.
If you have to reconnect to the gateway through the VPN after connecting, you can change the IP address used for Safe update validation.
Once connected, auto-connect is automatically enabled for the VPN.
If you've setup some routes (or set the connection as the default route) you may loose connection to the gateway. You can create a checkpoint with NetworkManager to enable automatic connection recovery. The Manager GUI does this automatically.
sudo nmcli connection up <connection>Connection successfully activated (D-Bus active path: /org/freedesktop/NetworkManager/ActiveConnection/14)
NetworkManager will create an additional connection : the tunnel used by the VPN.
You can then check the details of the connection with:
nmcli con show <connection>Auto-connect at boot
You'll probably be interested in configuring the NetworkManager so that the VPN automatically connects after boot.
You can do this by telling to the carrier connection that it must connect the VPN after it connects itself successfully. The carrier connection is the connection that links the gateway to the VPN server.
Get the UUID of the VPN connection :
$ nmcli connection
NAME            UUID                                  TYPE      DEVICE
corporate-vpn   a669d583-7e82-4d71-acc6-cbad2d7f1635  vpn       eth0
backhaul        390e5c2b-7312-415e-80e6-7b94a5c24fc3  ethernet  eth0
tun0            8ea3e20f-0e05-4220-b037-9abc32c75d28  tun       tun0
service         a2d8dd17-b8e2-37ac-977b-3166fe55e16f  ethernet  --
In our example, it's a669d583-7e82-4d71-acc6-cbad2d7f1635.
Add it as secondaries property of the carrier connection:
sudo nmcli connection modify backhaul connection.secondaries a669d583-7e82-4d71-acc6-cbad2d7f1635You may have multiple carrier connections. You can add the VPN UUID as secondaries of all of them.