System upgrade
The LORIX One system can be fully update with a new system image. These updates are totally fail safe as the update is done atomically. This means the switch from the old to the new system is done in a single operation meaning that if a power loss occurs at any time during the update, you will always have a bootable system.
Update process
The LORIX One provide a very simple way to upgrade to the new versions of the system, but it lets you full control over when to do it.
The update process is split in three steps:
- Download the upgrade to the gateway
- Apply the upgrade and restart the gateway
- Confirm the upgrade
Each of this step is manually triggered by the user, so that you don't have updates being applied when you have a critical need of your system. At each step, you can choose to cancel the upgrade and you can even go back to an older version if something wen wrong during the upgrade.
Check for new updates
The gateway can automatically check online if there is a new update available. To do so, you need an access to the Internet.
When ou go to the System Update page, the GUI will automatically check if new updates are available online.

You can check available update with the manager:
Check available upgrades
manager system update checkChecking available updates... You already have the latest version - Version 0.3.1 (Chaussy) - Date: 2019-12-18 14:44:29 +0000 UTC
The manager also automatically check for available updates if the gateway has access to the Internet. If an update is available, you will be informed when you log in through the "Message of the day".
You can configure the automatic check through the manager configuration /etc/manager/config.yml :
Manager update check configuration
# Configure how the system is updated by the manager
update:
  ...

  # When set to true, the manager will automatically check online if new updates are available. The user will be notified through the message of the day (after login) when a new update is available.
  onlineCheck: true

  # Time between two checks for new updates
onlineCheckPeriod: 24hUpdate channels
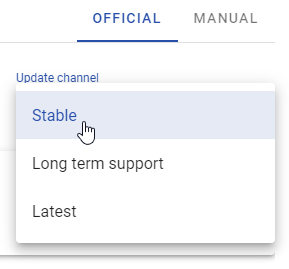
The updates are released through multiple channels that will have a different update frequency:
- latest - uses the latest versions as soon as they are released
- stable - use the versions that are known to be in use for a few weeks
- lts - uses long term support releases only
You can configure the channel used in the manager by changing the select list in the update page:
You can configure the channel used in the manager configuration /etc/manager/config.yml:
Manager update channel configuration
# Configure how the system is updated by the manager
update:
  # Channel of the update feed that will be used : latest|stable|lts
channel: stablePerform the upgrade
The GUI will guide you through the upgrade steps.
You can see the current status of the upgrade with the manager:
sudo manager system update statusThe "message of the day" shown after login will also show you if an upgrade is in progress.
Download
You can start a download with the manager:
sudo manager system update startThe manager will then download the update to the gateway. Once done, it will ask you if you want to install it.
The manager will take the latest release based on the selected feed. If you want to use a specific version, you can specify the release URL with the -r option.
Install
You can install a downloaded upgrade with:
sudo manager system update installThe manager performs the migration of your configuration.
Once done, restart the gateway either using the manager or run:
sudo rebootThe manager doesn't force you to reboot right after the update, but keep in mind that once the migration is done, any changes to the configuration will not be persisted after the reboot.
From this point, if the gateway is power cycled, it will start into the upgraded system as if you rebooted.
You can cancel an update after is has been applies:
sudo manager system update cancelValidate
After reboot, check that anything works as expected. When you fully validated the new system, validate the upgrade with:
sudo manager system update persistIf you have any problem with the new system, you can roll back to the previous version with:
sudo manager system update rollbackIf you don't have access to the gateway after the reboot, you can simply power cycle the gateway and it will restart in the previous version.
If the gateway is power cycled before the new version has been persisted, it will boot into the previous version. All modifications made in the new system will be lost.