Architecture and challenges
This page is just informative, you don't need to read it to execute the upgrade process.
The legacy firmware and the LORIX OS have some important differences that makes this upgrade process really challenging:
- The memory layouts are completely different
The legacy firmware for example, has a partition for the kernel and one for the rootfs while the LORIX OS has two rootfs partitions (power outage protection) and the kernel directly embedded into the rootfs- As many embedded systems, the memory is strongly linked to the OS, layout and partition modifications are not as easy as on a personal computer
- To support the kernel embedded into the rootfs, the bootloader has been updated since older version of the legacy firmware was not supporting this feature
- We do the maximum of the process as "non irreversible" like downloading upgrade material before starting the process:
- The NAND memory can't be modified too early (this is irreversible)
- The RAM memory is really limited and we need to create special images with reduced size and increase the process steps
- Through the multiple system image used in the process, it's difficult to migrate every parameters. Reason why only simple network parameters are migrated.
Process steps
Step 1 - Prepare the initramfs
The first step consists of configuring the migration, this is mainly what is visible to the user:
- Detect the product and the current network configuration and save these values inside the bootloader memory area to pass them to the temporary Linux system (initramfs)
- Upgrade the pre-bootloader and bootloader with new versions supporting ubifs management (to load the kernel from the rootfs)
- Download the initramfs which will be used on next reboot into the legacy firmware rootfs
Step 2 - Temporary Linux kernel in RAM
An initramfs is a Linux kernel resident in RAM (instead of NAND/SD Card) which can contain directly a rootfs (often minimal).
Step 2a
Before modifying the memory layout (Step 2b), we need to do as much as possible "reversible" operations. We will then do the following:
- Retrieve the network parameters from the bootloader memory area
- Start the network, retrieve the time with NTP and run a connectivity check
- Download the intermediary (reduced size) LORIX OS. Since we don't want to destruct yet the memory layout, this LORIX OS need to fit into the RAM memory which is limited in size.
At this point, we did all the reversible steps reducing the risks at the maximum. Until the step 2b if, for any reason, an error occurs, the system would rolls back to the legacy firmware.
Step 2b
This step modifies the memory layout, from there, roll back is not possible anymore.
Because the raw NAND is strongly coupled to the Linux kernel, we can't modify layout memory without complex and custom NAND driver.
Another solution, is to load a temporary Linux kernel into RAM memory, this kernel is aware of the new memory layout and can modify it.
The following actions are done:
- Format and reprogram the pre-bootloader and bootloader with final versions
- Format the main ubi partition and program it with the two rootfs + data volumes containing the temporary (reduced size) LORIX OS
- Reboot on this temporary LORIX OS
Step 3 - Temporary LORIX OS
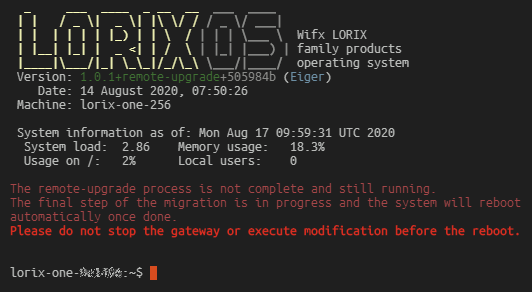
The system reboots and starts the new LORIX OS. This system is almost the same as the final LORIX OS but has limited features (no manager, no LoRa packet forwarders).
You can already log in but you should not modify parameters at this point.
It will download the final image of LORIX OS (version 1.0.1) and reboot.
At this point, the power failure safe update is already supported.
Step 4 - Finaly LORIX OS
After the third reboot, the definitive LORIX OS system starts and finalizes its installation as if you programmed it using the LORIX Programming Tool.
You are now free to configure all the aspects like password, antenna type and LoRa forwarding as well as complex network configuration.