Device programming
Device programming
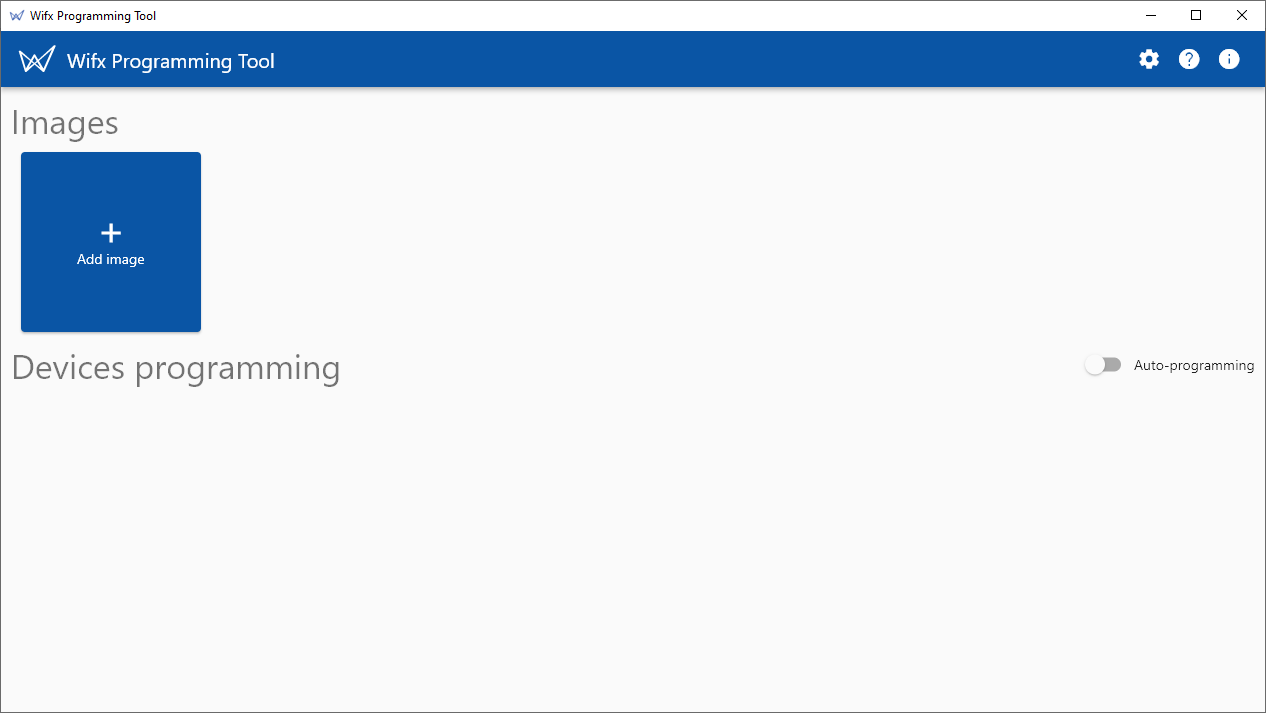
Overview
The programming tool has two main sections:
- The first, called "Images" allows you to load the archive of the image you want to program on the device.
- The second, called "Devices programming" allows you to see devices available for programming and program them with one of the loaded archives.
Download an archive (*.wimg)
You can find the latest system images in the download area of LORIX OS.
Load an image
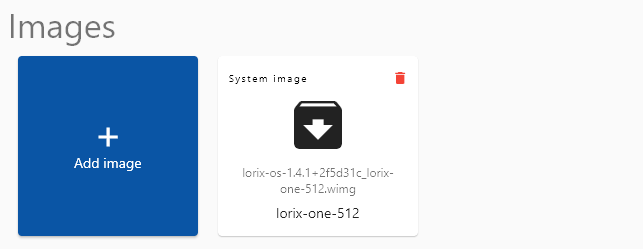
To load an image, click the "Add image" button.
The Programming Tool will then extract the image from the archive, read the included metadata and validate that the images are valid regarding the metadata description.
The archive will be extracted in the operating system temp folders. In Windows, the path is : %TMP%\wifx\programming-tool\archives .
If the archive has anything wrong, you will get informed with a warning message.
You can check that the loaded image supported the product you want to program by checking the system image information card:
If everything is fine, you can go on with connecting your device.
Connect your device
To program the device, you need to connect it to your computer with the USB cable and power the device (with Ethernet PoE or USB-C).
Once the device connected, you need to put it into programming mode.
Entering programming mode
To enter programming mode, you need to remove any SD card inserted into the device and to be connected to a PC with the USB cable.
To enter programming mode, you have to press shortly 2 times on the reset button and then keep pressed a third time for at least 3 seconds (until the status LED flashes again):
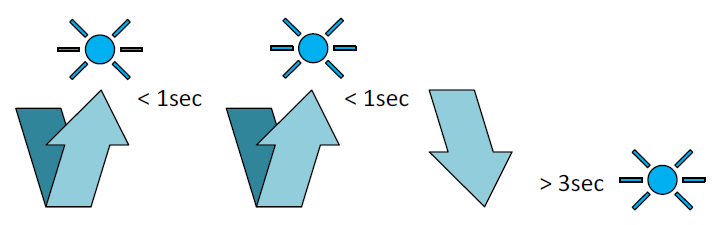
Note that the time between each press must be very short (<0.5 seconds). The blue LED must flash at each press. If the sequence failed, wait for 5 seconds before you try again.
Your device will then be listed in the list of available devices to program:

If you cannot enter programming mode, please read the Operating modes and reset page for additional details.
Program the device
Data loss
When programming the device with the Programming Tool, all existent data and configuration will be erased and overwritten with the new image. This means that all your current data and configuration will be definitely lost.
Select the image you want to program for the device in its "Image" field.
If there is a compatible image laoded, it will be selected by default automatically.
Then, click the "program" button, the programming will start:

The devices list will show you an approximate progression of the programming process through the progression and the numeric percentage.
When programming of a device is finished, a check mark with the success message is shown:

You can safely reset the device by pressing the reset button in the Programming Tool or the physical button on the gateway and remove the USB cable.
Congratulation, your device is now ready with the new firmware!
Programming log
To see the details of the programming process, you can expand the device panel by pressing the right hand arrow button:
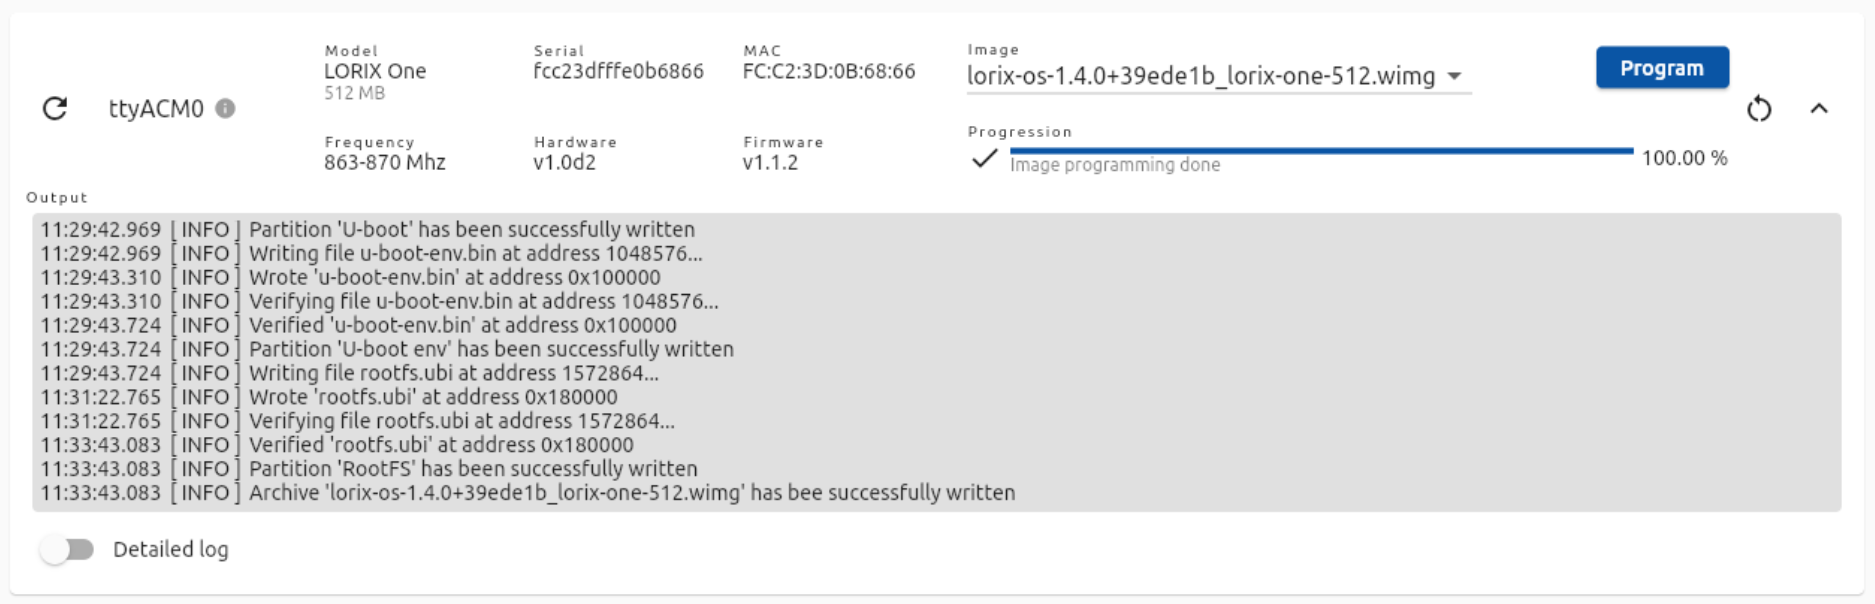
This log is particularly useful to diagnose programming errors. You can find a typical successful programming log here : Log.txt.
Programming error
In case of failure, you will get an error message popping from the bottom of the application and the corresponding device status will show an error icon. To diagnose the error, please refer to the device programming log.
Auto programming
If you need to program a large number of devices, you may be interested in enabling the "Auto programming" feature. When enabled, all new connected devices detected will be automatically programmed with the first compatible loaded image without asking confirmation to the user.