UDP Packet Forwarder (Semtech)
The UDP Packet Forwarder (UPF) is based on the original and legacy Semtech UDP packet forwarder.
The UDP Packet Forwarder is installed by default on all gateways with LORIX OS.
The features of the UPF are identical to the Semtech Packet Forwarder. The software has been slightly improved to support additional configuration parameters and to improve the overall stability.
Connect to The Things Network
To know how to configure the forwarder for TTN, please check the The Things Network / Industries documentation chapter.
The UDP Packet Forwarder binary is located at /opt/udp-packet-forwarder/udp-packet-forwarder
Configuration
The UPF configuration is split into three part : hardware, channels and gateway.
All the configuration files of the UPF are store in /etc/opt/udp-packet-forwarder.
The Antenna type must be set before configuring the UDP Packet Forwarder
Hardware
The hardware configuration contains very low level settings related to the gateway radio frequency parameters. This file is provided by Wifx and it must not be changed.
The hardware configuration file is provided with a cryptographic signature that ensures the authenticity of the configuration. If you change anything in the hardware configuration, it will not be valid anymore and the forwarder will not be able to use it.
If you've lost the hardware config or its signature, you can recover the original file from /data/layers/factory/etc/opt/udp-packet-forwarder/hardware/ or you can download it from the Download area.
Files location
The hardware configuration files are stored in /etc/opt/udp-packet-forwarder/hardware:
/etc/opt/udp-packet-forwarder/hardware/hardware_conf.json/etc/opt/udp-packet-forwarder/hardware/hardware_conf.json.sha256
Frequency plan (channels)
The channels configuration contains the LoRa frequency plan definition.
The available channels depend on the region the gateway is configured. You can configure the frequency plan the gateway will use.
You can change the frequency plan on the LoRa > Forwarder page:
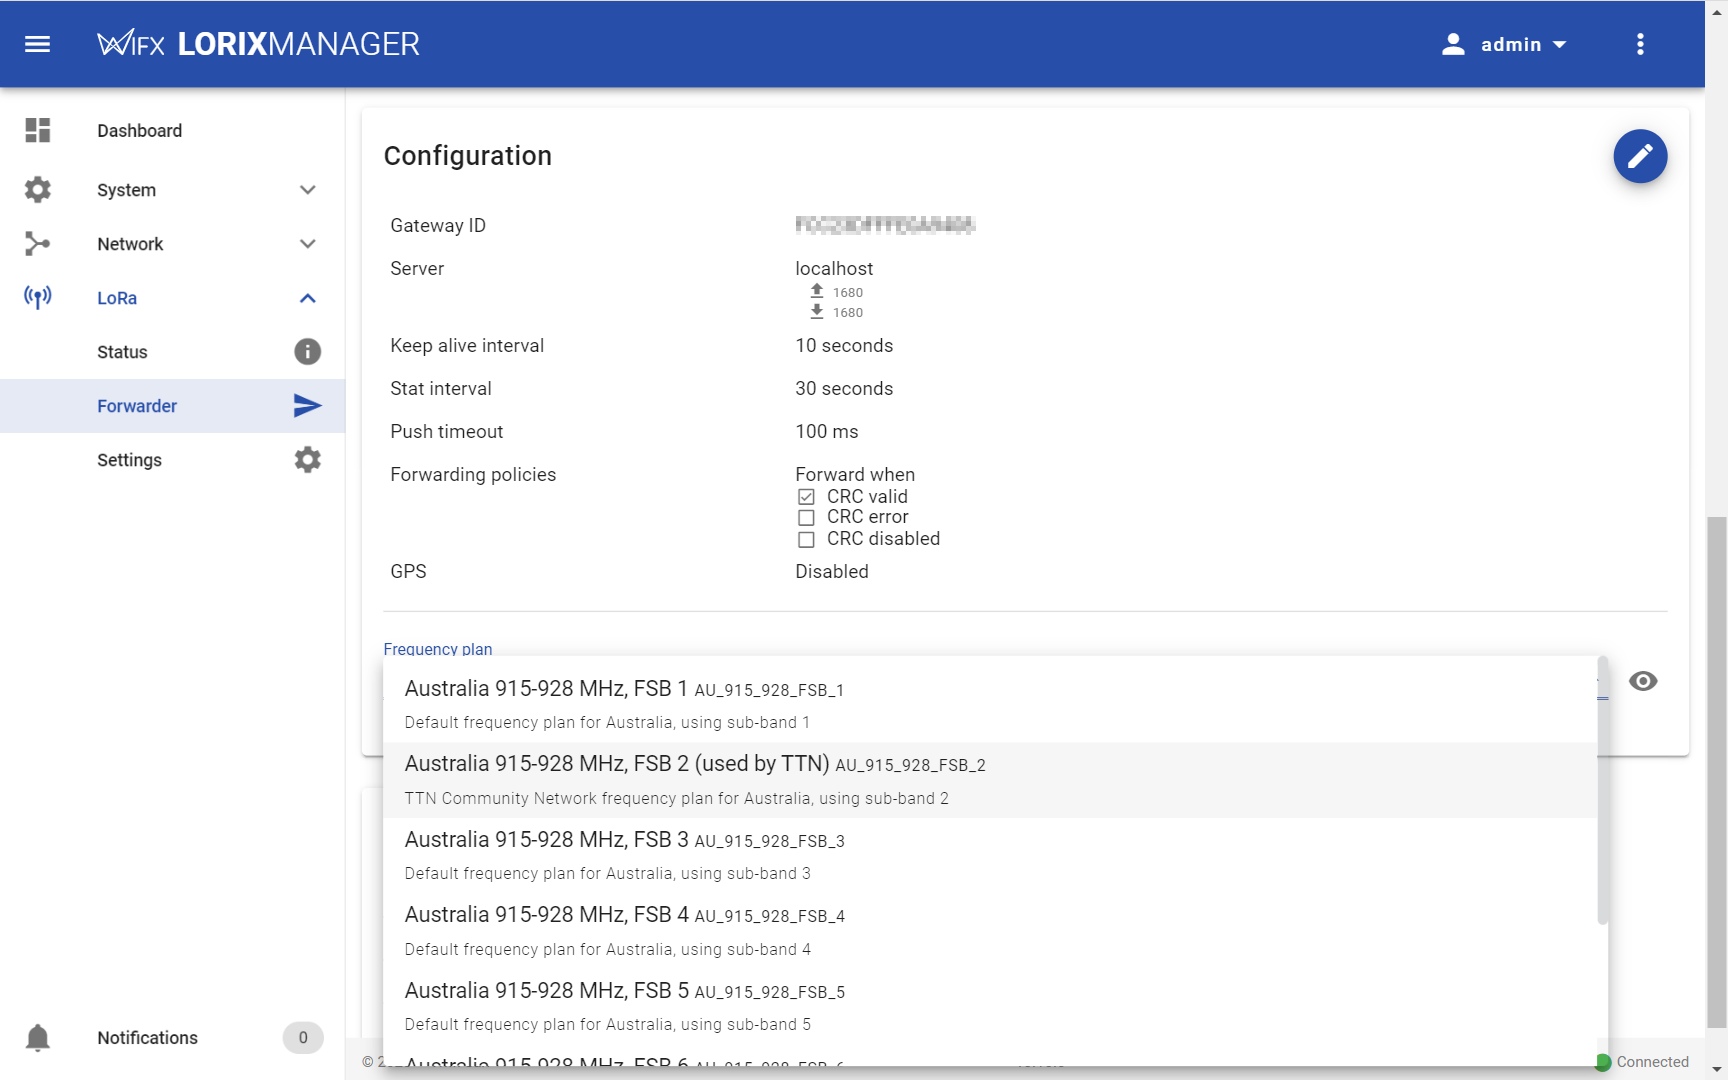
You can see which frequency plans are available with:
manager lora forwarder udp-packet-forwarder plan listOutput for US915 region
- [US_902_928_FSB_1] United States 902-928 MHz, FSB 1 (Default frequency plan for the United States and Canada, using sub-band 1)
- [US_902_928_FSB_2] United States 902-928 MHz, FSB 2 (used by TTN) (TTN Community Network frequency plan for the United States and Canada, using sub-band 2)
- [US_902_928_FSB_3] United States 902-928 MHz, FSB 3 (Default frequency plan for the United States and Canada, using sub-band 3)
- [US_902_928_FSB_4] United States 902-928 MHz, FSB 4 (Default frequency plan for the United States and Canada, using sub-band 4)
- [US_902_928_FSB_5] United States 902-928 MHz, FSB 5 (Default frequency plan for the United States and Canada, using sub-band 5)
- [US_902_928_FSB_6] United States 902-928 MHz, FSB 6 (Default frequency plan for the United States and Canada, using sub-band 6)
- [US_902_928_FSB_7] United States 902-928 MHz, FSB 7 (Default frequency plan for the United States and Canada, using sub-band 7)
- [US_902_928_FSB_8] United States 902-928 MHz, FSB 8 (Default frequency plan for the United States and Canada, using sub-band 8)You can set the frequency plan with:
sudo manager lora forwarder udp-packet-forwarder plan set <frequency-plan-id>Output for US_902_928_FSB_2
Frequency plan set to 'US_902_928_FSB_2'You have to restart the forwarder to make the new frequency plan active
AS920
- AS 920-923
AS923
- AS 923-925
- AS 923-925 (TTN AU)
AU915
- AU 915-928 (FSB1)
- AU 915-928 (FSB2)
- AU 915-928 (FSB3)
- AU 915-928 (FSB4)
- AU 915-928 (FSB5)
- AU 915-928 (FSB6)
- AU 915-928 (FSB7)
- AU 915-928 (FSB8)
EU868
- EU 863-870
IN865
- IN 865-867
RU864
- RU 864-870
US915
- US 902-928 (FSB1)
- US 902-928 (FSB2)
- US 902-928 (FSB3)
- US 902-928 (FSB4)
- US 902-928 (FSB5)
- US 902-928 (FSB6)
- US 902-928 (FSB7)
- US 902-928 (FSB8)
If you want to use another channel than the provided ones, you can add a channel configuration file in the corresponding region folder and change the symbolic link of the reference file.
Files location
The channels configuration files are stored in /etc/opt/udp-packet-forwarder/channels:
/etc/opt/udp-packet-forwarder/channels/channels_conf.json- Symbolic link to the selected channel/etc/opt/udp-packet-forwarder/channels/<REGION>/- Folders containing the available channels for each region
Gateway
The gateway configuration is stored into two different files:
- Global configuration file -
gateway_global_conf.json - Local configuration file -
gateway_local_conf.json
The goal of these two files is two split the configuration of a whole fleet of gateway (global) from the configuration specific to a single gateway (local).
The data from the local file always overrides the configuration of the global file.
The global configuration file will therefore contains settings that are relative to the infrastructure, for example:
- The Network Server address
- The forwarding rules
- The e-mail address of the operator
The local configuration file will contain settings related to a single gateway, for example:
- The gateway ID
- The gateway location
This possibility to split the configuration is here for convenience, it is not mandatory to use it if it doesn't fit your need. For a simple setup, we recommend editing only the local configuration file.
Files location
The gateway configuration files are stored in /etc/opt/udp-packet-forwarder/gateway:
/etc/opt/udp-packet-forwarder/gateway/generic/- Configuration used when using the UDP Packet Forwarder directly/etc/opt/udp-packet-forwarder/gateway/chirpstack-gateway-bridge/- Configuration used when using the ChirpStack Gateway Bridge