AWS IoT Core for LoRaWAN
To get started with AWS IoT Core for LoRaWAN, please read the following guide: LORIX One - Getting Started Guide for AWS IoT Core for LoRaWAN - v1.1.pdf
You can connect your LORIX OS gateways to AWS IoT Core in just a few simple steps with the Basic Station.
This will be done a the following steps:
- Create an AWS IoT Core account
- Register the gateways in AWS IoT Core
- Configure the gateway
Create an AWS IoT Core account
Connect to https://aws.amazon.com/ and create a new account, or use your existing one.
Register the gateways in AWS IoT Core
For this step, please refer to the AWS IoT Core documentation. The Developer Guide contains all the needed information in the AWS IoT Core for LoRaWAN section.
Once you read the introduction, please move to the Onboard your gateways to AWS IoT Core for LoRaWAN section. We recommend using the Console to onboard the gateway.
While onboarding your gateway you will need the Gateway UID. Please refer to the Gateway UID page to find the UID.
As you configure the gateway during the onboarding process, create a Gateway certificate and download both Gateway certificate file and Private key file.
Configure and connect the gateway
Connect to the Manager GUI and go to the LoRa > Forwarder page.
Select the LoRa Basic Station as the active forwarder.
Configure the Basic Station
In the Configuration section, enable the Configuration and Update Server part.
Endpoint
Take the CUPS endpoint provided during the onboarding process, or copy it from the Gateway details page.
- Remove the protocol and the port and copy it to the Address field.
- Copy the port to the Port field
Provided endpoint address : https://A1RPDVYV83ZPN1.cups.lorawan.us-east-1.amazonaws.com:443
Manager GUI configuration:

Secure TLS connection
Enable the Secure TLS connection option and select Use local root certificates.
By using the local root certificates, you don't have to provide the LNS certificate to authenticate it as it will use the public key infrastructure instead. LORIX OS will automatically manage the root certificates.
Client authentication
Enable the Client authentication option and select Use certificate and key.
Use the Gateway certificate files downloaded during the onboarding process:
- Set the
*.cert.pemfile as the Client certificate. - Set the
*.private.keyfile as the Client certificate key.
The Gateway certificate file cannot be downloaded after the onboarding process for security reasons. If you did not download the file, you can create a new one by using the Attach CUPS certificate button on the Gateway details page.
Verify and save
Your configuration should like similar to this:
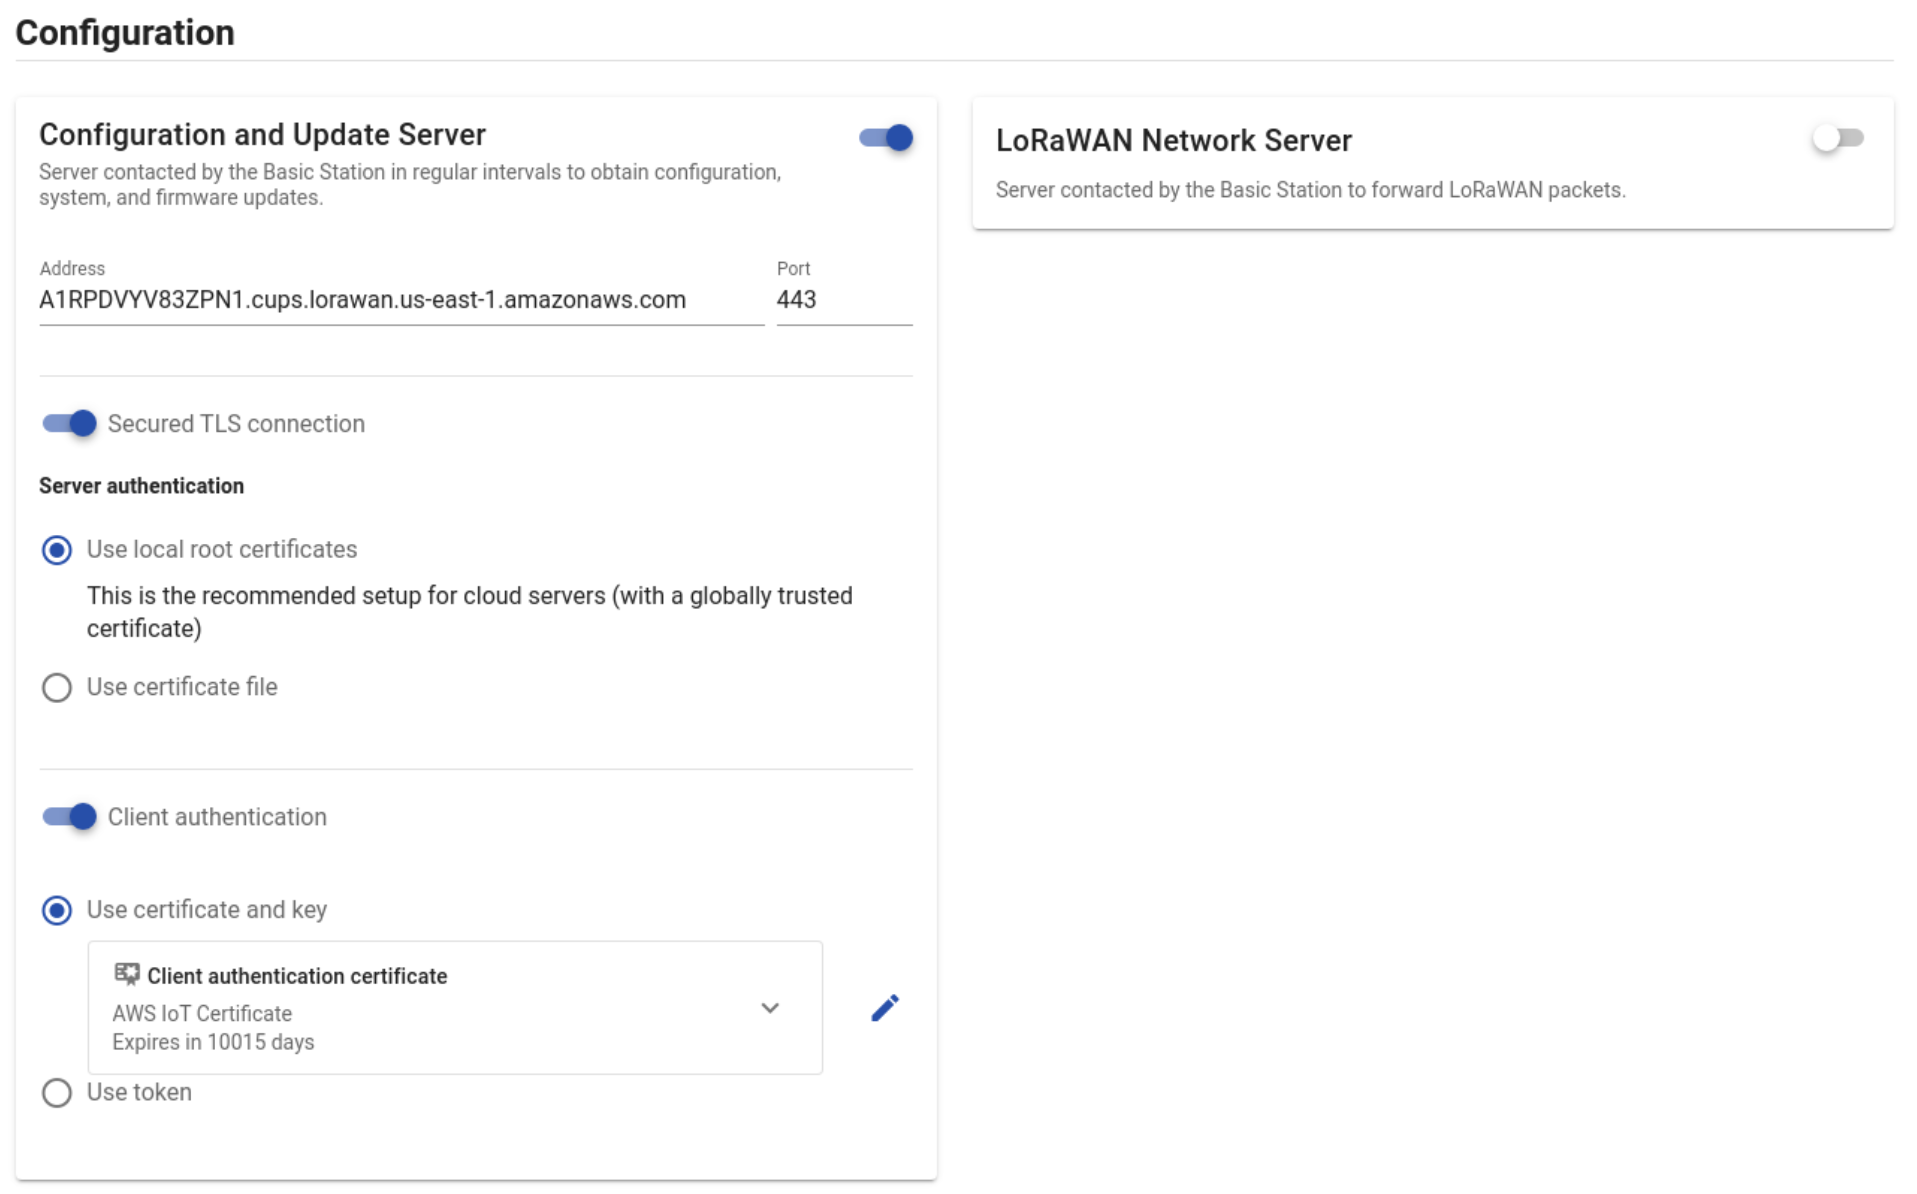
Verify the information and press the save button.
Connect the gateway
Press the Start button to enable the Basic Station. Check the AWS console and the LoRa > Status page of the Manager GUI for connectivity status.
If connection fails, please check the Basic Station logs and the Basic Station Troubleshooting page to find out the issue.