Packet Forwarders
Pre-installed forwarders
To integrate with many Clouds and Network Servers, LORIX OS is shipped with some default Packet Forwarders:
Manage the forwarder
The manager provides a set of tools to manage the forwarder in an easy and centralized way. They are generally available from both the GUI and the CLI.
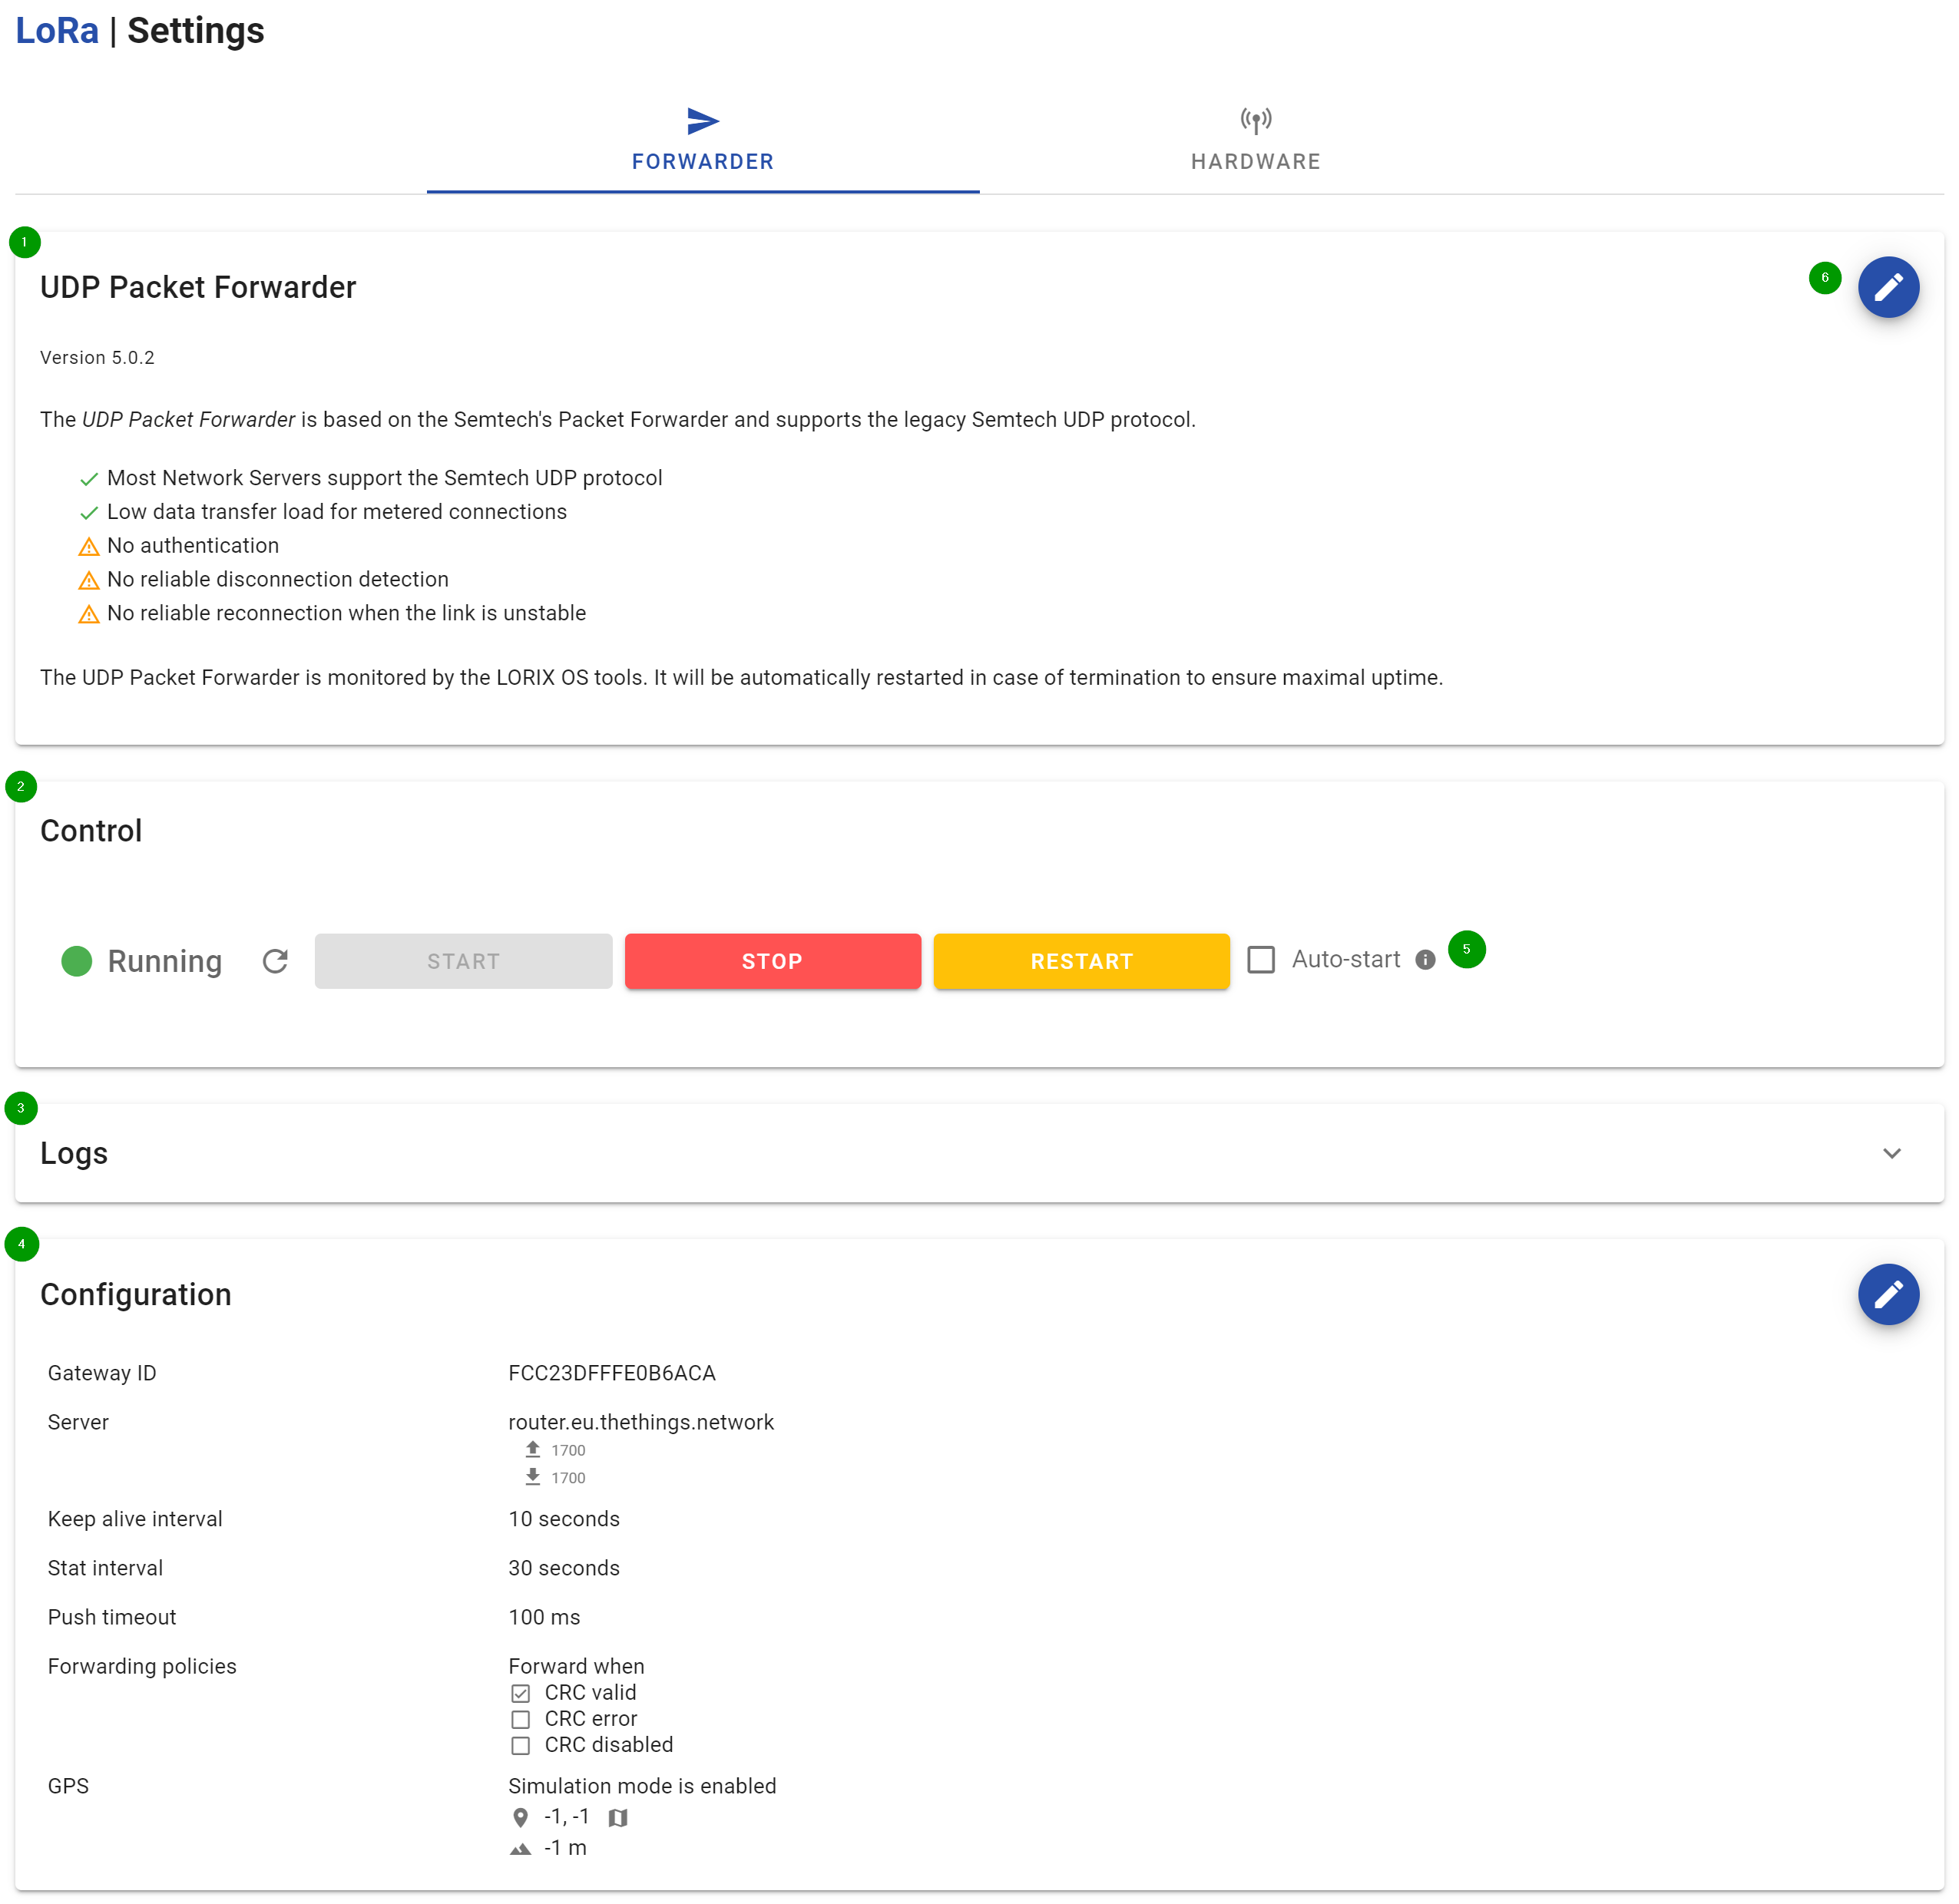
Overview
- Shows the active forwarder and it's basic information
- Shows the status and control of the active forwarder
- Live display of the forwarder logs
- Shows the configuration of the active forwarder. This part is specific to each forwarder.
- Forwarder control buttons
- Active forwarder selector
The available CLI commands are:
COMMANDS:
   active                                       Print the currently active forwarder
   available                                    Print all available forwarders
   set                                          Set the active forwarder
   udp-packet-forwarder                         Manage UDP Packet Forwarder
   loriot-packet-forwarder                      Manage LORIOT packet forwarder
   chirpstack-gateway-bridge                    Manage ChirpStack Gateway Bridge
   lora-basic-station                           Manage LoRa Basic Station
Select the forwarder
Only one forwarder can be running on the system at the same time.
You can choose your forwarder on the LoRa Settings page using the Active forwarder selector (4).
To see the available forwarders, use:
manager lora forwarder availableAvailable forwarders are: - UDP Packet Forwarder (udp-packet-forwarder, upf) - LORIOT packet forwarder (loriot-packet-forwarder, loriot) - ChirpStack Gateway Bridge (chirpstack-gateway-bridge) - LoRa Basic Station (lora-basic-station)
You can set the active forwarder with:
sudo manager lora forwarder set <FORWARDER>FORWARDER must be the forwarder ID as shown in the available command output. Any alias can be used.
Example
sudo manager lora forwarder set chirpstack-gateway-bridgesettings active forwarder to 'chirpstack-gateway-bridge'... done
Configure the forwarder
Each forwarder has different parameters to be set up. Please refer for the page relative to the forwarder to have additional information about how it is configured.
Control the forwarder
You can control the forwarder on the LoRa Settings page using the Forwarder control buttons (5).
To start the forwarder, use:
manager lora forwarder <FORWARDER> startExample
sudo manager lora forwarder chirpstack-gateway-bridge startChirpStack Gateway Bridge forwarder has been started
You can stop or restart the forwarder with the similar start and restart commands.
Logging
Independently of the selected forwarder, the output is centralized in a single place to facilitate diagnostic.
The standard and error output (stdout and stderr) are logged to syslogd.
The forwarder logging can be enabled or disabled through the configuration files available in /etc/pmonitor/services-available by settings the log property to false.
Installing another forwarder
The integration of third party forwarders is usually made by the Cloud or Network Server providers. Please refer to their documentation to get additional information.